Invoice & Estimate Templates
Invoice & Estimate Templates let shop owners and managers control exactly what prints on your invoices and estimates — which sections appear, how line items are shown, signature lines, warranty text and more — with a live preview of the finished PDF as you make changes.
Before you start
You need permission to change shop Settings.
Templates are set per location. Make sure the correct location is selected before editing.
Changes only take effect after you click Save.
Open Invoice Templates
Click Settings in the left menu, scroll down to Documents, and click Invoices.

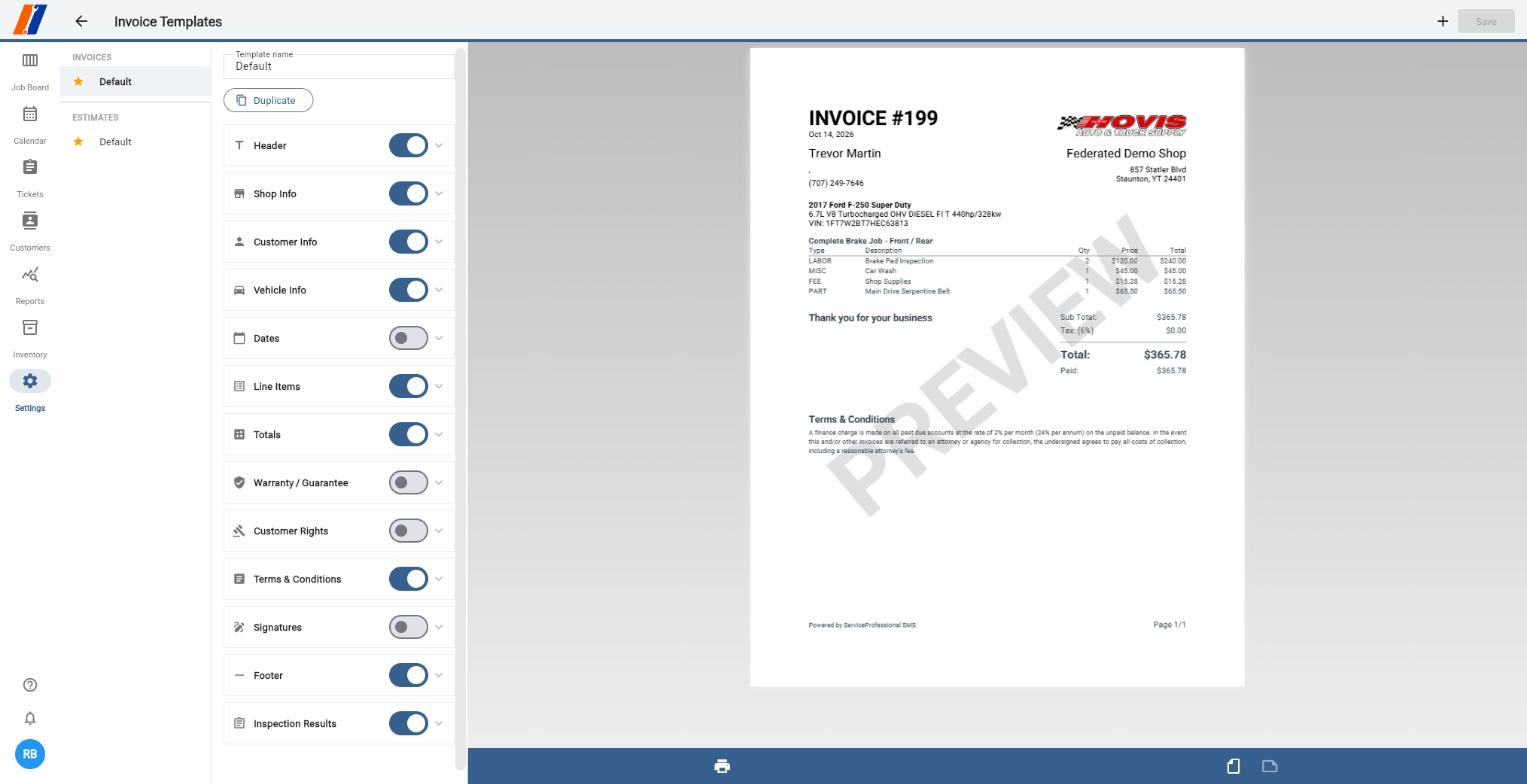
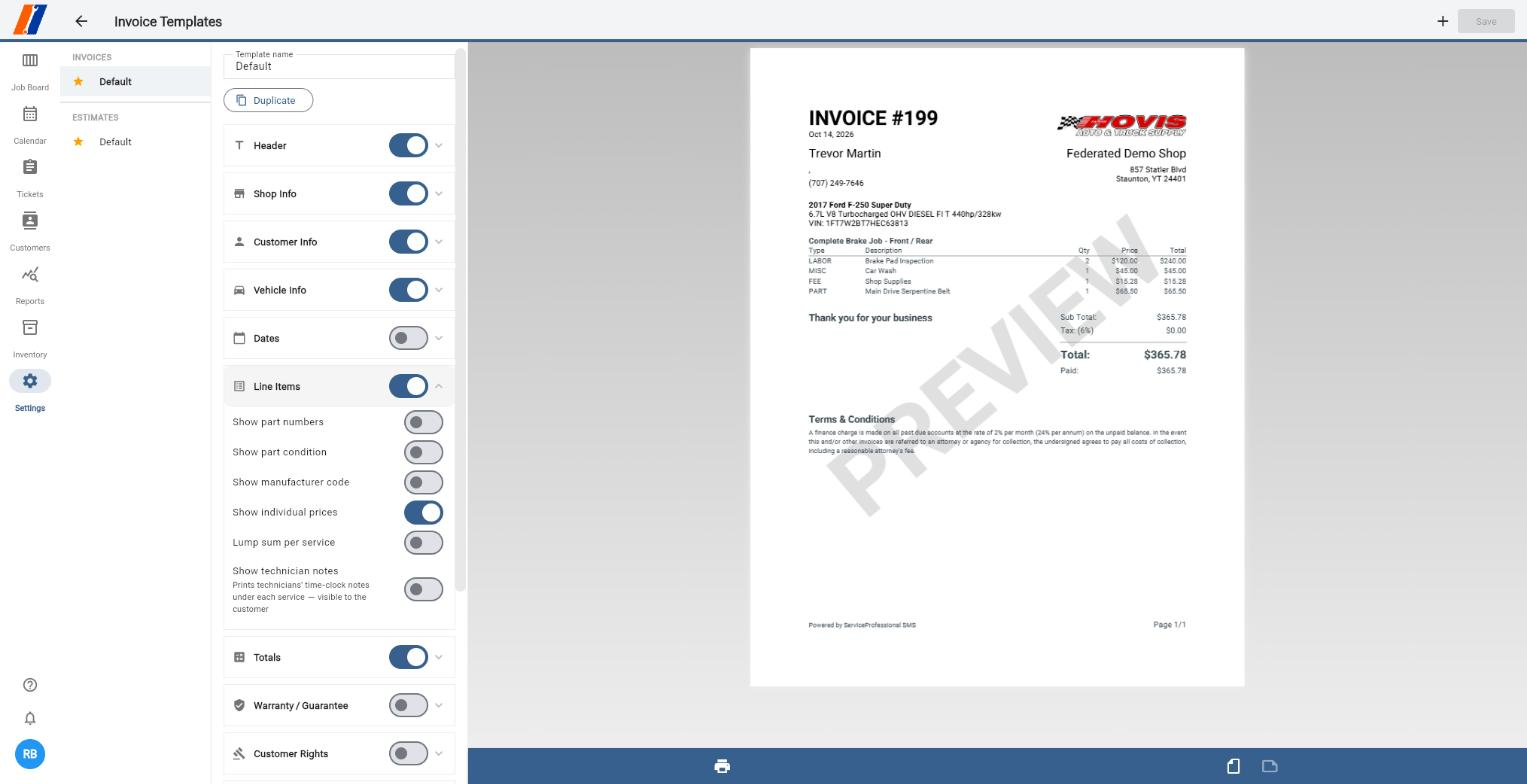
The Invoice Templates page opens. Your templates are listed on the left, the sections you can turn on or off are in the middle, and a live preview of a real invoice is on the right.
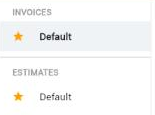
Templates are grouped into Invoices and Estimates. The template marked with a ★ is the default — it's the one used when you print or send that type of document.
Create a new template
You can keep several named templates — for example one for fleet customers and one for retail customers.
Click the + (New Template) button in the top-right corner.
Enter a Template name, choose whether it's for an Invoice or an Estimate, and pick what to Start from.
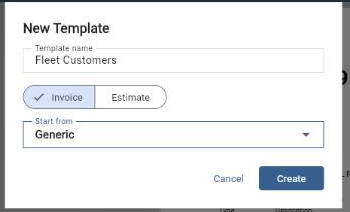
Start from gives you a ready-made layout. Generic works for most shops; state-specific layouts (such as Florida (FDACS)) include the wording those states require.
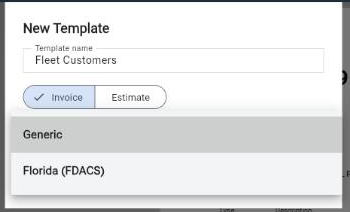
Click Create. The new template appears in the list, ready to customize.
Tip: To copy an existing template instead, select it and click Duplicate. To make a template the one that prints by default, select it and click Set Default.
Choose which sections appear
Each section of the document has its own switch: Header, Shop Info, Customer Info, Vehicle Info, Dates, Line Items, Totals, Warranty / Guarantee, Customer Rights, Terms & Conditions, Signatures, Footer and Inspection Results.
Turn a switch on to print that section, off to hide it.
Click a section's name to expand it and see its detailed options.
Customize line items
Click Line Items to expand it.
Choose what to show for each line:
Show part numbers, Show part condition, Show manufacturer code
Show individual prices — or turn on Lump sum per service to show one price per service instead
Show technician notes — prints the notes technicians add when they clock out, under each service. These are visible to the customer.
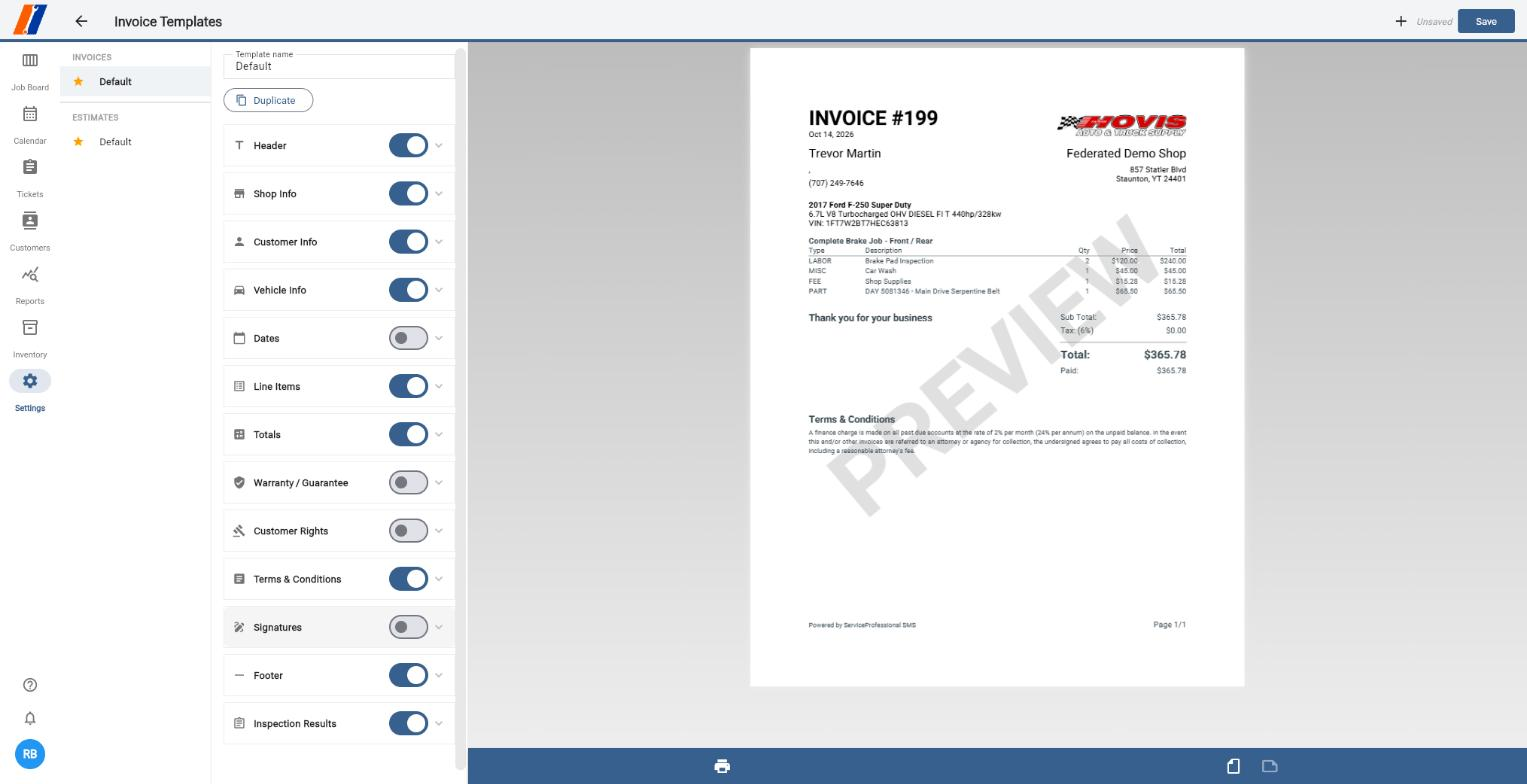
As soon as you change an option, the page shows Unsaved and the Save button becomes active.

The preview refreshes after a few seconds so you can check the result — here, part numbers now appear next to the part description.
Add signature lines
Turn on Signatures and click it to expand.
Choose Customer signature line and Date line, and edit the Authorization text printed under the signature (for example, "I hereby authorize the above work and acknowledge receipt of copy.").
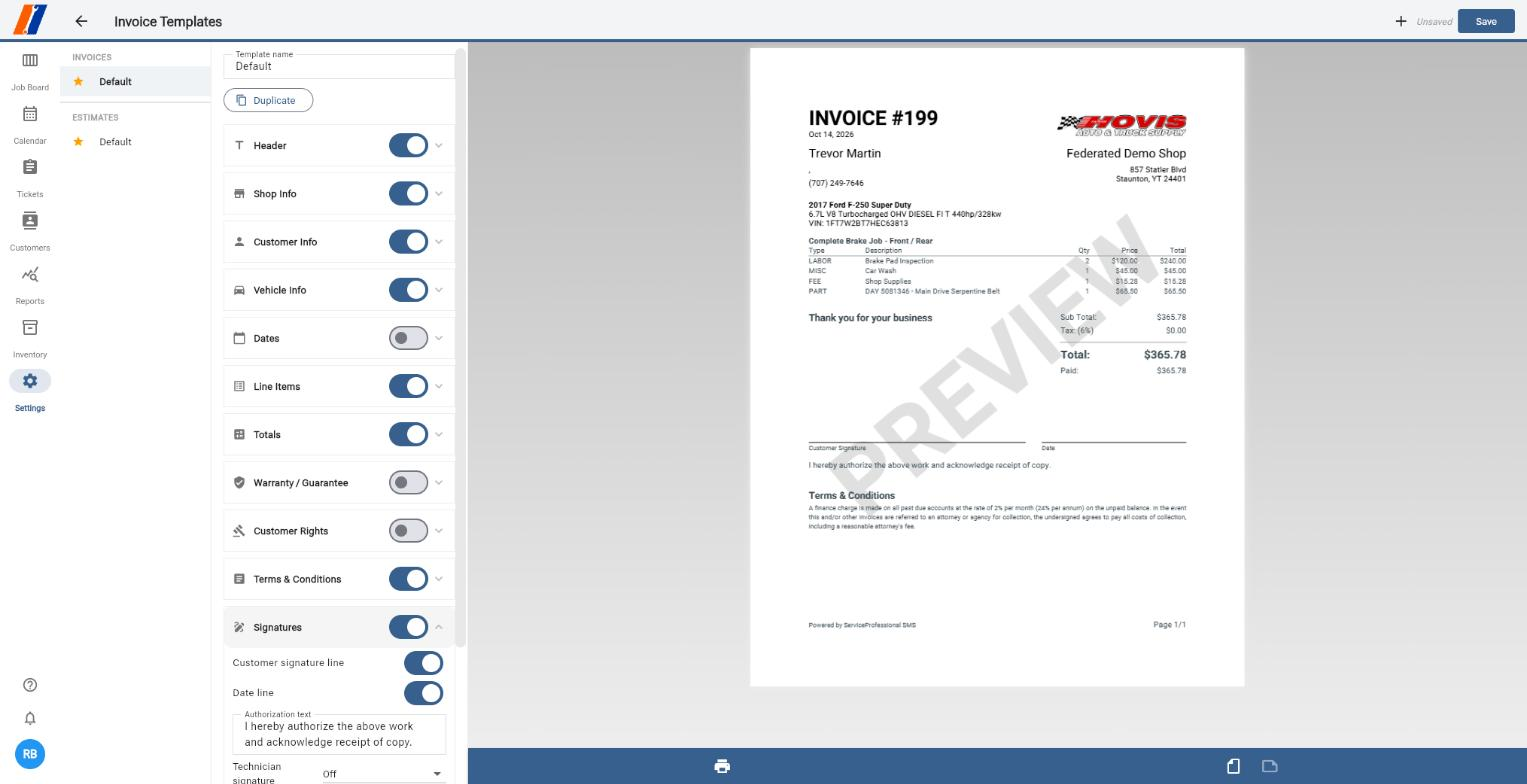
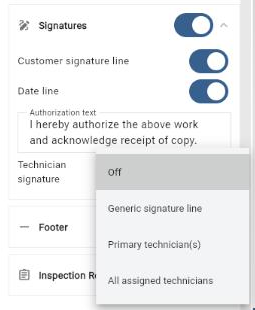
Use Technician signature to add a line for your techs:
Off — no technician signature
Generic signature line — one blank technician line
Primary technician(s) — a line for each service's primary tech, with their name printed
All assigned technicians — a line for every tech assigned to the work
When you choose Primary technician(s) or All assigned technicians, use Technician name format to decide how each tech's name prints under their line (for example full name, short name or initials).
Add warranty text
Turn on Warranty / Guarantee and click it to expand.
Type your shop's warranty in Warranty text. It prints in its own section on the invoice.
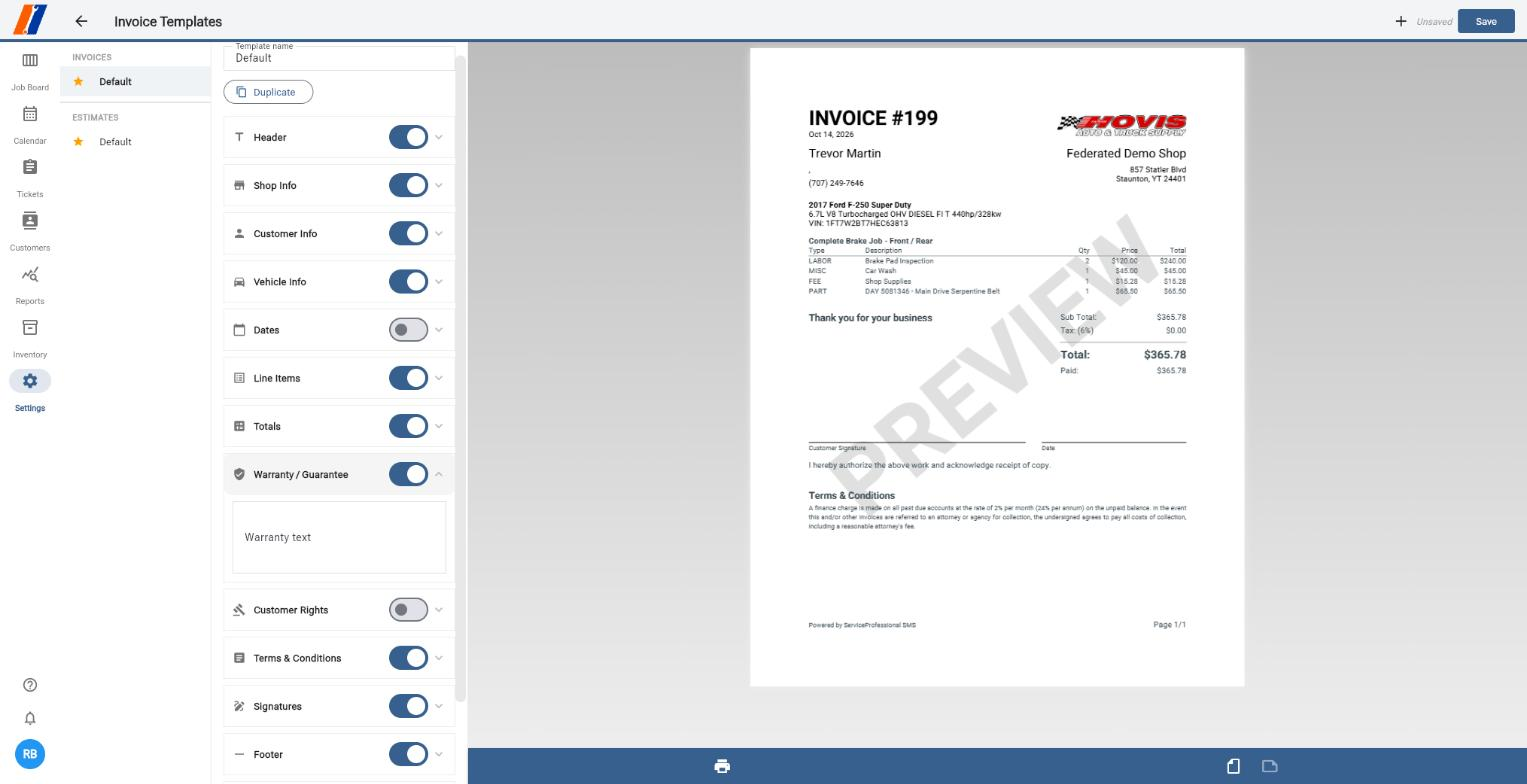
Car Care Center members: If your location is enrolled in the Car Care Center program, you'll also see Car Care Center nationwide warranty. Turn it on to add the nationwide warranty on its own page (so it can print on the back of the invoice), and choose Print warranty page in color if you like. The warranty term is set by ServiceProfessional Support.
Save your changes
Click Save in the top-right corner. If you leave the page without saving, your changes are discarded.
Tips
Use the print button under the preview to print a test copy before saving.
Keep estimates simpler than invoices — for example, hide Customer Rights and Signatures on estimates if you collect authorization another way.
If you turn on Show technician notes, remind techs that their clock-out notes will be seen by customers.
Troubleshooting
The preview is blank or spinning. The preview can take several seconds to refresh after each change. Wait a moment before making the next change.
My change didn't show on a printed invoice. Make sure you clicked Save, and that you edited the template marked as default (★) for the right location.
I don't see the Car Care Center warranty option. It only appears for locations enrolled in the Car Care Center program. Contact Support if your location should be enrolled.
Related articles
Creating & Managing Tickets
Location Settings
Time Clocks