Importing Customer Data
If you're moving to ServiceProfessional from another system, the Import Data page brings in your existing customers, vehicles and invoice history, so your team doesn't have to re-type them.
Before you start
You need permission to change shop Settings.
Imports go into the location currently selected. Switch to the right location first.
Export your data from your old system first (steps for each system are below and on the import card itself).
Switching from AutoLeap or FIBMS? These are migrated by our team. Contact ServiceProfessional Support with your export or backup file and we'll import your customers, vehicles, repair history and payments for you.
Open Import Data
Click Settings in the left menu, scroll to the bottom, and under Data click Import Data.

Each source system has its own card. Click a card to expand it.
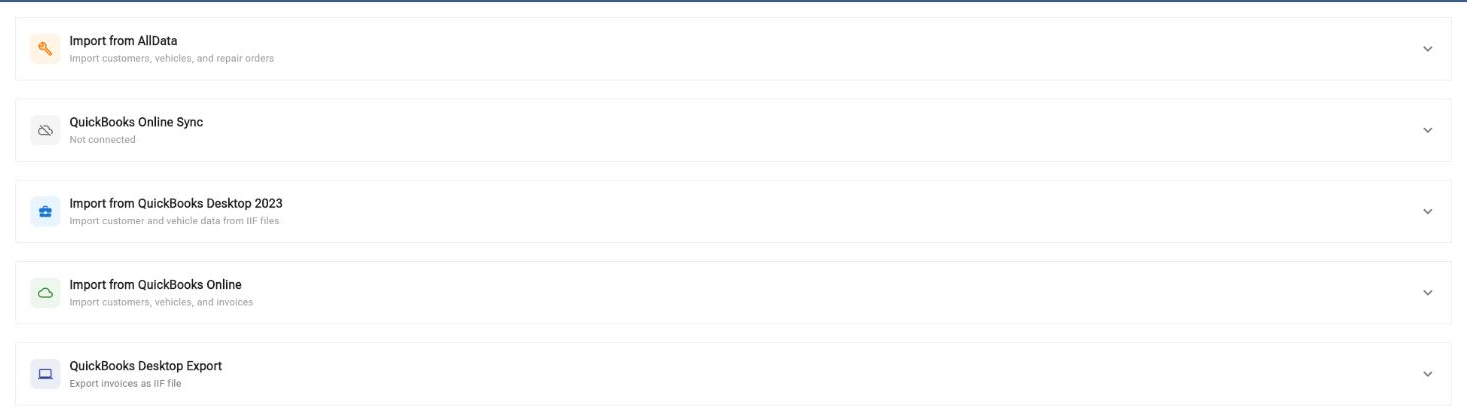
Import from AllData
Brings in customer names, addresses and phone numbers; vehicles with year, make, model, VIN and plates; invoices with parts, labor and supplies; and odometer readings.
In AllData, go to Reports › Invoice Export, pick a 2-month date range and export it as a CSV file. Repeat for each 2-month period you want to bring over.
In ServiceProfessional, expand Import from AllData.
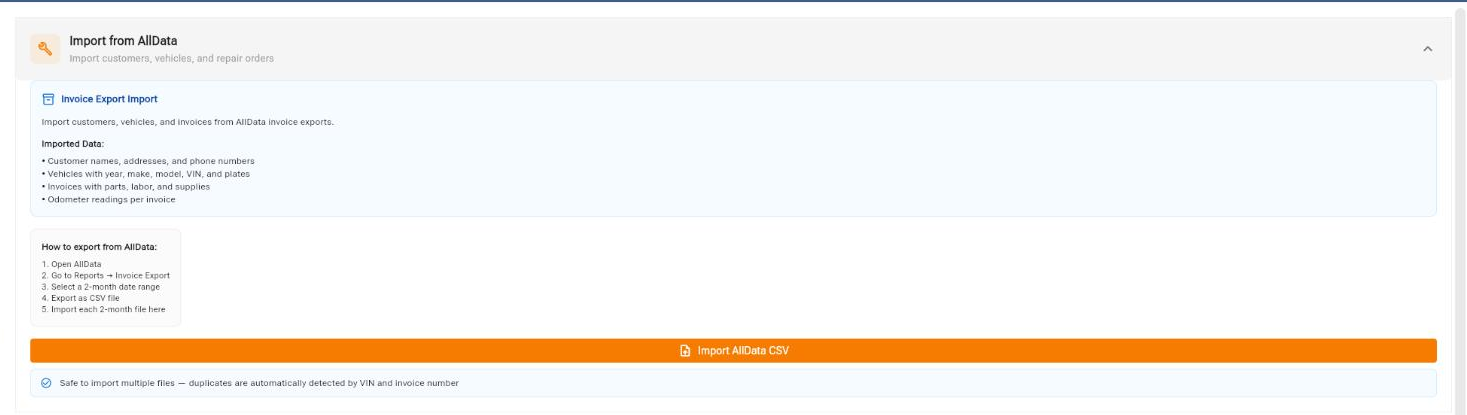
Click Import AllData CSV and choose one of your exported files. Repeat for each file.

It's safe to import overlapping files — duplicates are detected automatically by VIN and invoice number.
Import from QuickBooks Desktop 2023
Brings in customer names and companies, billing addresses, phone numbers and emails, and vehicle information (year, make, model, VIN).
In QuickBooks Desktop 2023, go to Lists › Customer & Vendor Profile Lists › Customer List, then File › Utilities › Export › Lists to IIF Files, select Customer List and save the IIF file.
In ServiceProfessional, expand Import from QuickBooks Desktop 2023 and click Import IIF File.
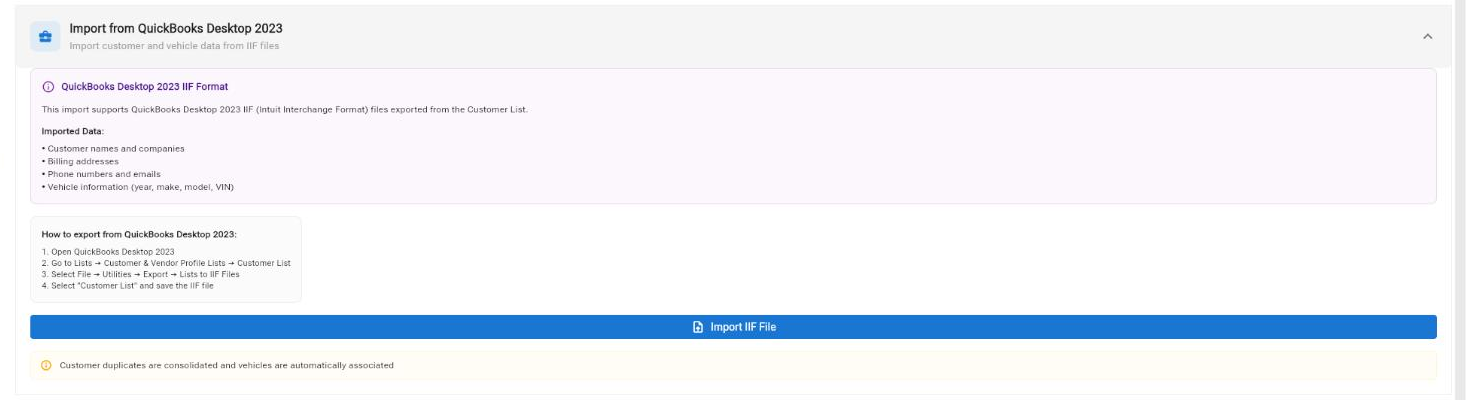
Duplicate customers are consolidated and their vehicles are linked automatically.
Import from QuickBooks Online
Brings in customer names and contact info, phone numbers and emails, billing addresses and vehicle information (if available).
In QuickBooks Online, go to Sales › Customers, click the Export icon and choose Export to Excel.
In ServiceProfessional, expand Import from QuickBooks Online. Under Select Import Type, choose Customers (choose Journal instead to import invoice transactions), then click Import Customer List.
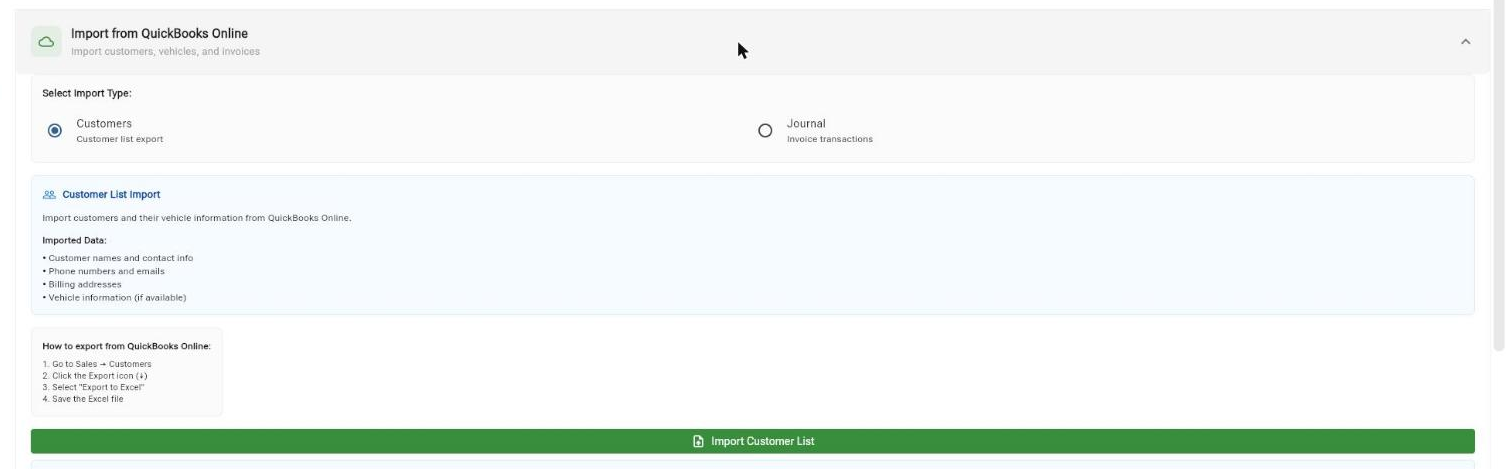
When the import finishes, you'll see how many customers were imported or matched.
After importing
Open Customers and spot-check a few records and vehicles.
Imported invoices appear in each customer's history.
To keep QuickBooks up to date going forward, see QuickBooks Online Sync (sends new invoices to QuickBooks automatically) or QuickBooks Desktop Export (exports invoices as an IIF file) on the same page.
Troubleshooting
"Please select a location first." Choose a location in the app, then try again.
"Import failed." Make sure you exported in the format listed on the card (CSV for AllData, IIF for QuickBooks Desktop, Excel for QuickBooks Online) and that the file wasn't edited or re-saved in another format.
Some customers are missing. Check that they were included in the export date range or list in your old system, then import that file again — duplicates won't be created.
Related articles
Customers
Reports
Location Settings