Employee Settings

The Employee Settings page allows you to manage your team members and their access to Service Professional.
Overview
The Employee Settings interface provides:
Card-based employee directory
Quick search and filtering
Active/inactive employee sections
Integrated authentication management
How to Use
Adding a New Employee
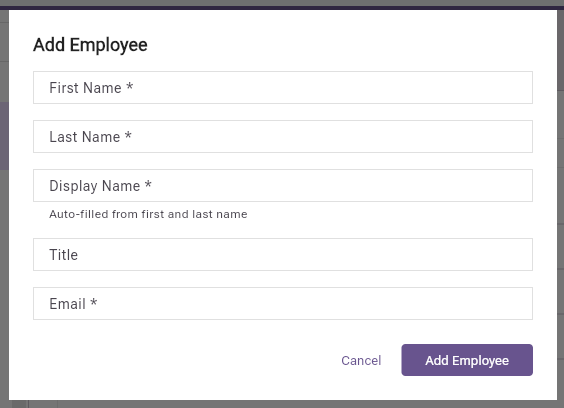
Click the Add Employee button in the top bar.
Fill in the required information:
First Name (required)
Last Name (required)
Display Name (auto-filled but editable)
Title (optional)
Email (required)
Click Add Employee to create the account.
Editing Employee Information
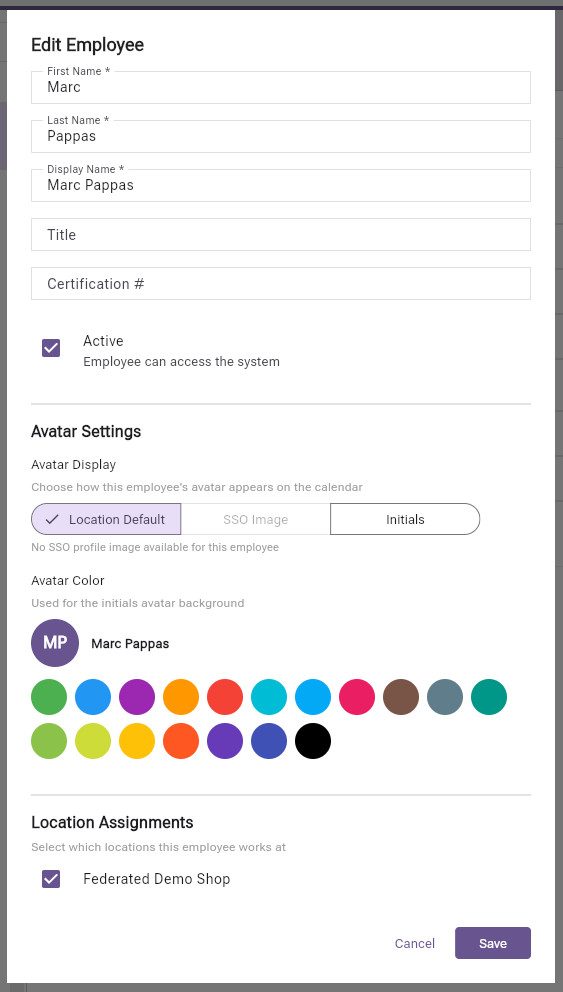
Find the employee using search or scrolling.
Click the edit icon or anywhere on the employee card.
Update the necessary fields.
Click Update to save changes.
Managing Employee Status
Deactivating an Employee
Edit the employee.
Toggle the Active switch off.
Preserves all data and history.
Removes system access.
Reactivating an Employee
Edit the inactive employee.
Toggle the Active switch on.
Restores all permissions.
May require password reset.
Searching for Employees
Click the search icon in the app bar.
Enter search terms (name, title, etc.).
View filtered results instantly.
Click Clear to reset search.
Best Practices
Employee Onboarding
Prepare Information: Gather all employee details before adding.
Consistent Naming: Use consistent format for display names.
Clear Titles: Use descriptive job titles for clarity.
Test Account: Create a test employee first if needed.
Communication: Inform employees about invitation emails.
Data Management
Regular Audits: Review active/inactive status quarterly.
Update Promptly: Keep contact information current.
Archive Don’t Delete: Deactivate instead of removing employees.
Document Roles: Maintain clear job title descriptions.
Security Considerations
Unique Emails: Each employee needs a unique email address.
Strong Passwords: Encourage strong password creation.
Access Review: Periodically review who has system access.
Immediate Deactivation: Deactivate accounts immediately upon termination.
Display Name Guidelines
Professional Format: “John Smith” or “Smith, John”.
Consistency: Choose one format for all employees.
Nicknames: Include if commonly used: “Bob Smith (Robert)”.
Initials: Generated automatically from first and last names.
Tips and Tricks
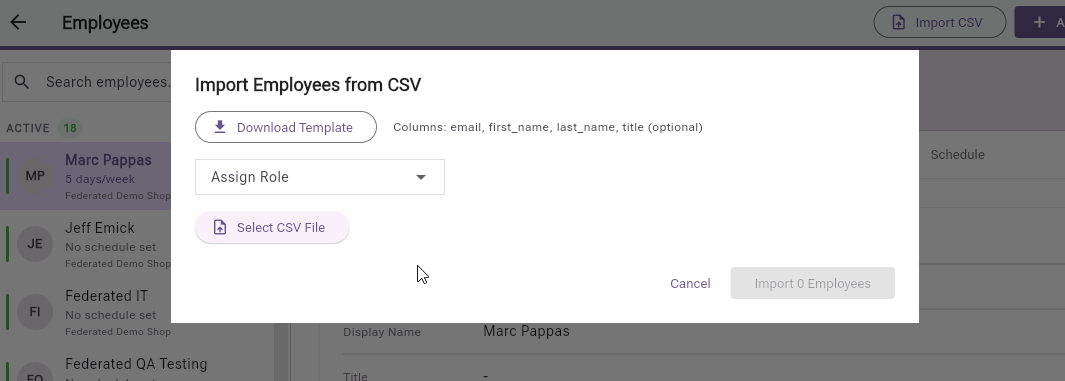
Bulk Operations: Add multiple employees in succession without closing dialog.
Quick Search: Type partial names for faster searching.
Status Toggle: Quickly activate/deactivate from the edit dialog.
Sort Order: Employees display alphabetically by display name.
Troubleshooting
Common Issues
Employee Can’t Login
Verify email address is correct.
Check if invitation email was received.
Resend invitation if needed.
Ensure account is active.
Invitation Email Not Received
Check spam/junk folders.
Verify email address has no typos.
Confirm email server settings.
Contact support if persistent.
Duplicate Employee Entries
Check for variations in email addresses.
Review active and inactive sections.
Merge duplicates through support.
Related Settings
Company Settings - Configure business information.
Services Settings - Manage service offerings.
Repair Order Settings - Set workflow permissions.